| View previous topic :: View next topic |
| Author |
Message |
mrmike

Joined: 06 Sep 2007
Posts:
Location: coronado, ca
|
 Posted: Mon Sep 15, 2008 12:20 pm Post subject: another new one Posted: Mon Sep 15, 2008 12:20 pm Post subject: another new one |
 |
|
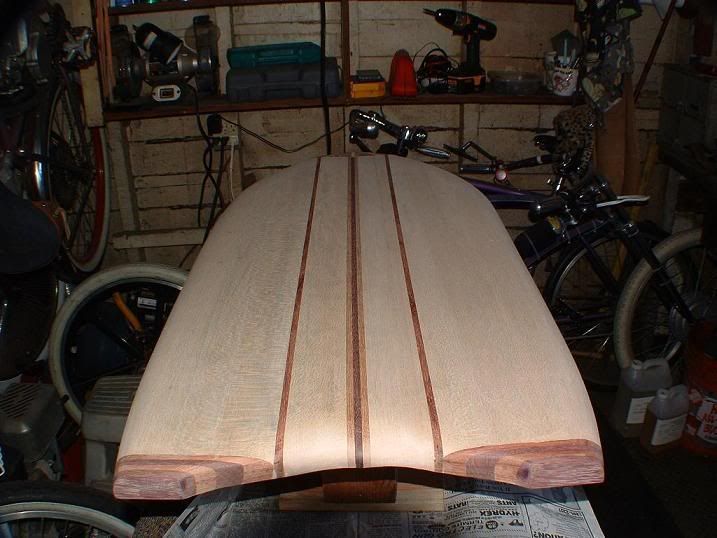
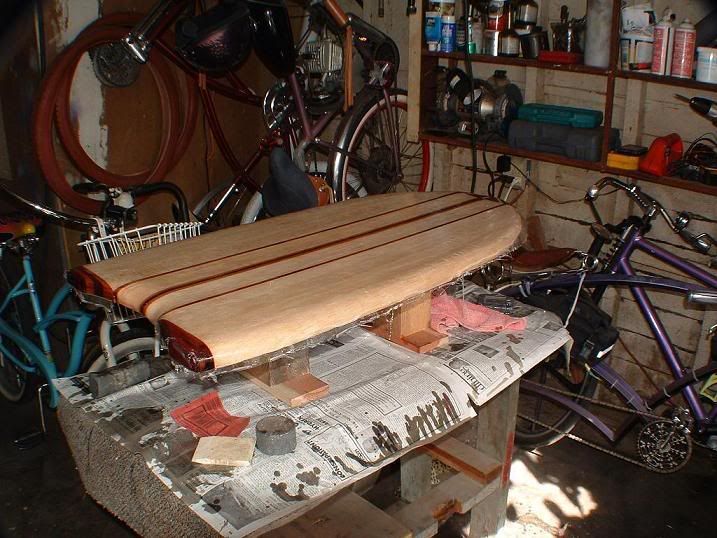
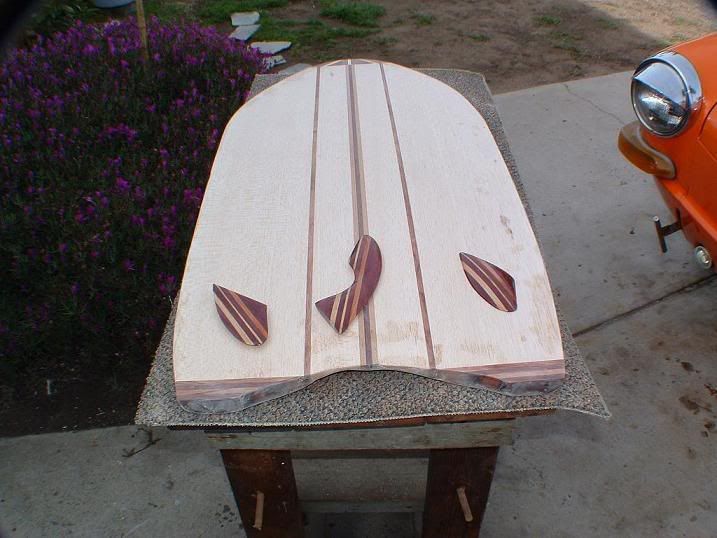
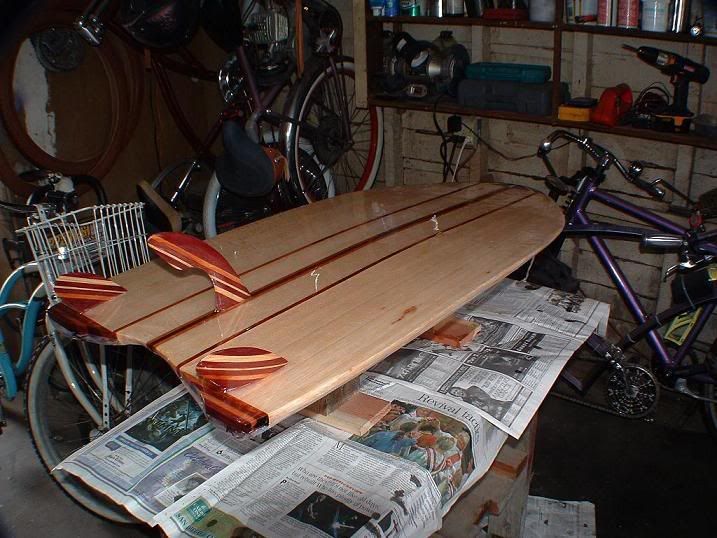
this one is red oak and rose wood a little heavey 48" x18" nose x 12" tail mrmike  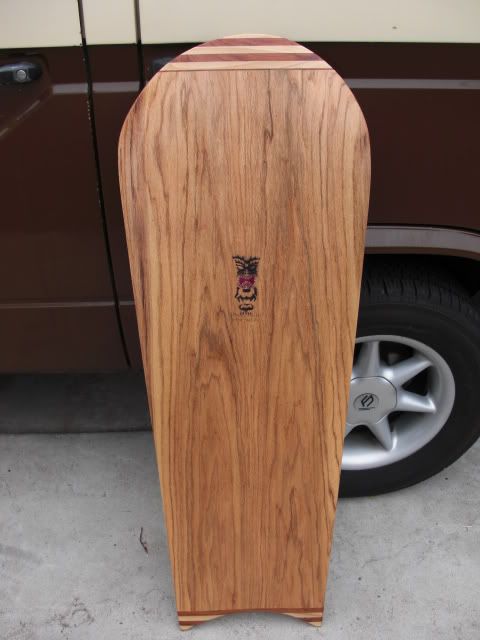
_________________
PAIPO ON
blog http://mrmikespaipos.blogspot.com |
|
| Back to top |
|
 |
MeatyBarrels

Joined: 06 Feb 2007
Posts:
Location: California, San Diego
|
| Posted: Mon Sep 15, 2008 2:55 pm Post subject: |
|
|
I really like the boards you've posted on here. But, this one is by far my fav! I really, really like the color on the oak and the shape on the tail block is nice.
_________________
So now faith, hope, and love abide, these three; but the greatest of these is love. |
|
| Back to top |
|
|
bgreen

Joined: 20 Feb 2004
Posts:
Location: Qld. Oz
|
| Posted: Mon Sep 15, 2008 3:34 pm Post subject: |
|
|
Mike,
Seeing all these boards of yours & others has made me interested to see how you/others transform planks of wood into surfing works of art. Three things I would be especially interested in are: 1) whether you just butt the wood together or whether you use a tongue & groove join, 2) presuming some nose lift, do you start with a thicker piece of wood and plane it down or do you glue wood onto the nose and then remove the thickness from the bottom & nose area, 3) how do recommend getting an accurate. symmetrical bottom curve.
Bob |
|
| Back to top |
|
|
mrmike
Joined: 06 Sep 2007
Posts:
Location: coronado, ca
|
| Posted: Mon Sep 15, 2008 7:21 pm Post subject: |
|
|
BOB: I start by looking for wood that is flat and stright with good looking grain some times this takes me about 1hr or more. the lumber I start with is 7/8 to 1" thick I butt joint it all with tilebound 2 wood glue don't use 3 it set up too fast you need time to aline the wood. as for the noes I cut the wood with about 2deg angle when it is glued it kick up about 1 to 2". as for the bottom I use my power planer to get the shape I like. if I need more than the thickness of the board I cut the boards with a small angle before glueing this will get you close to the shape you want use a stright edge or framing square to check the bottom for symmetrical shape MRMIKE
_________________
PAIPO ON
blog http://mrmikespaipos.blogspot.com |
|
| Back to top |
|
|
bgreen
Joined: 20 Feb 2004
Posts:
Location: Qld. Oz
|
| Posted: Tue Sep 16, 2008 6:13 am Post subject: |
|
|
Mike ,
Thanks. Regarding the nose, I can now see that the woodwork is more than just 'show'. I was not so sure about: "if I need more than the thickness of the board I cut the boards with a small angle before glueing this will get you close to the shape you want use a straight edge or framing square to check the bottom for symmetrical shape "
If you have a board coming up where you do this - a picture would make this much clearer to me, if you were able to.
If you start out with 7/8 - 1", how thick do they end up? Are your boards thinner at the rails and thicker through the centre, or are they more uniform thickness throughout?
regards
Bob |
|
| Back to top |
|
|
bgreen
Joined: 20 Feb 2004
Posts:
Location: Qld. Oz
|
| Posted: Tue Sep 16, 2008 6:26 am Post subject: ah - now I think I know what you mean |
|
|
Mike,
with the bottom glue up, rather than the bottom being dead flat, if the bottom was made with three boards glued together, is it the case that the middle board would be slightly lower than the two outside boards, if you were wanting a rolled bottom?
Bob |
|
| Back to top |
|
|
mrmike
Joined: 06 Sep 2007
Posts:
Location: coronado, ca
|
| Posted: Tue Sep 16, 2008 6:40 pm Post subject: |
|
|
BOB: my boards are about 1/2" thick when I am done with them they taper out to the rails to about 1/4" thick with rolled down rails' as for a rolled botom with three boards I would cut the center board with 2 deg angle on each side of the center board. makeing sure one side is an opposing angle. I have cut it with the same angle on both sides and said oh s**t. this will give you 4 deg roll on the bottom I don't think you would want more than that.I am starting a new board as we speak when I get to the bottom I will take some pic's. this one will have a 1/2" concave bottom on 3/4 of the bottom. the board is going to be a alaia 5' long MRMIKE
_________________
PAIPO ON
blog http://mrmikespaipos.blogspot.com |
|
| Back to top |
|
|
bgreen
Joined: 20 Feb 2004
Posts:
Location: Qld. Oz
|
| Posted: Wed Sep 17, 2008 4:32 am Post subject: |
|
|
Mike,
That is very good of you. I would be very interested to see some of the steps that you are describing,
regards
Bob |
|
| Back to top |
|
|
mrmike
Joined: 06 Sep 2007
Posts:
Location: coronado, ca
|
| Posted: Fri Sep 19, 2008 3:17 pm Post subject: |
|
|
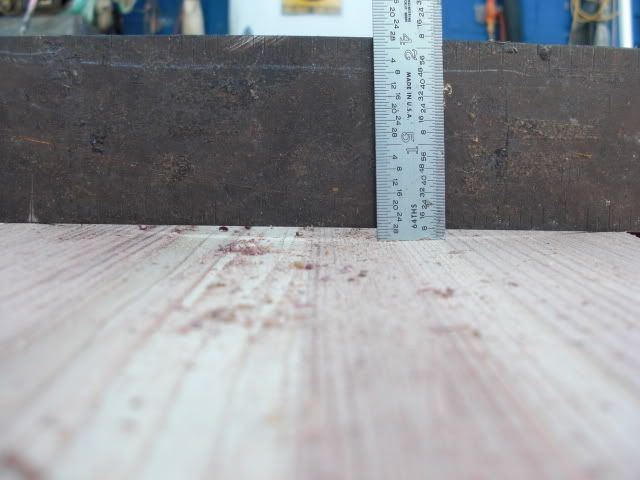
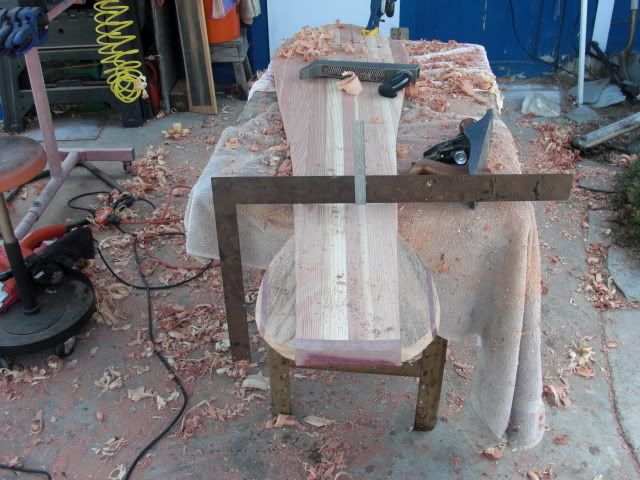
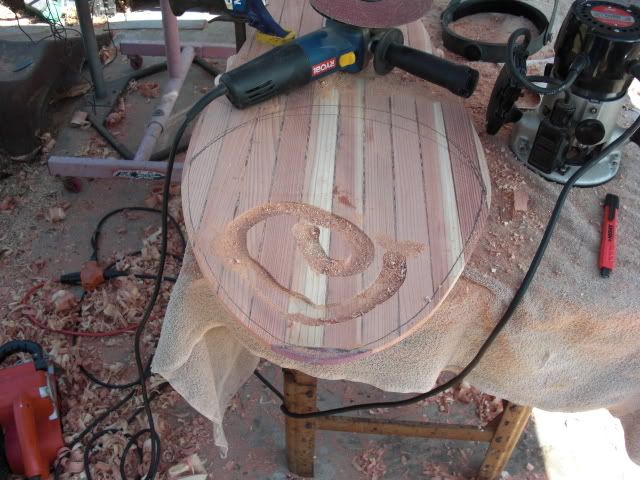
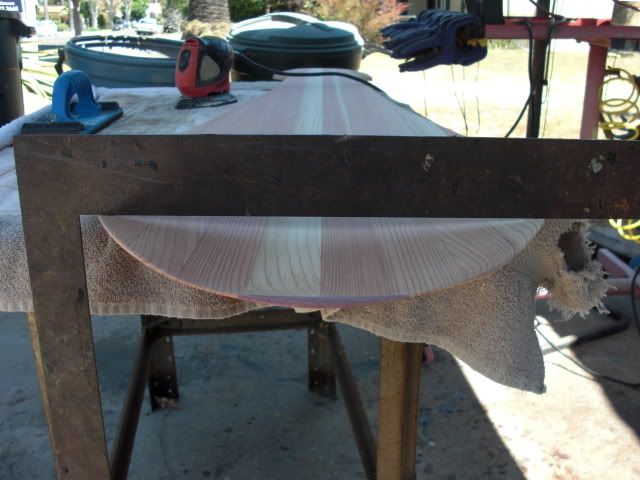
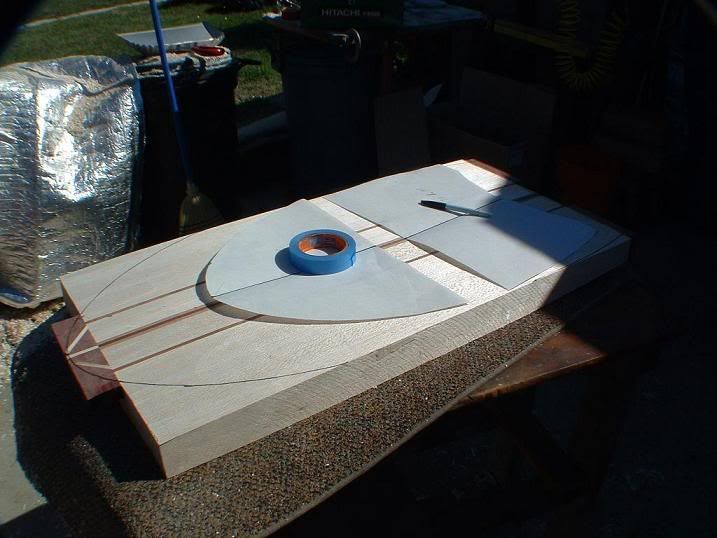
BOB: here are some pics how I get the bottom the way I want( this is a concave type. with a rounded bottom measure on the edge not the center) also this is how to dish the nose with a router, makes this step go faster. I hope this helps it is easyer to show somebody then write about it I an not so good at MRMIKE
_________________
PAIPO ON
blog http://mrmikespaipos.blogspot.com |
|
| Back to top |
|
|
bgreen
Joined: 20 Feb 2004
Posts:
Location: Qld. Oz
|
| Posted: Sat Sep 20, 2008 6:22 am Post subject: |
|
|
Mike,
Many thanks. Interesting to see your work bench. Next time - which will probbaly be pretty soon, you start another board I would be interested to see the very basic first steps - if this were possible/practical/not too much of a chore from your point of view,
regards
Bob |
|
| Back to top |
|
|
mrmike
Joined: 06 Sep 2007
Posts:
Location: coronado, ca
|
| Posted: Sat Sep 20, 2008 6:10 pm Post subject: |
|
|
BOB: this is a picture story I sent to a person who wanted to know how to make a paipo without going into to much detail so here it is
glue some nice wood together
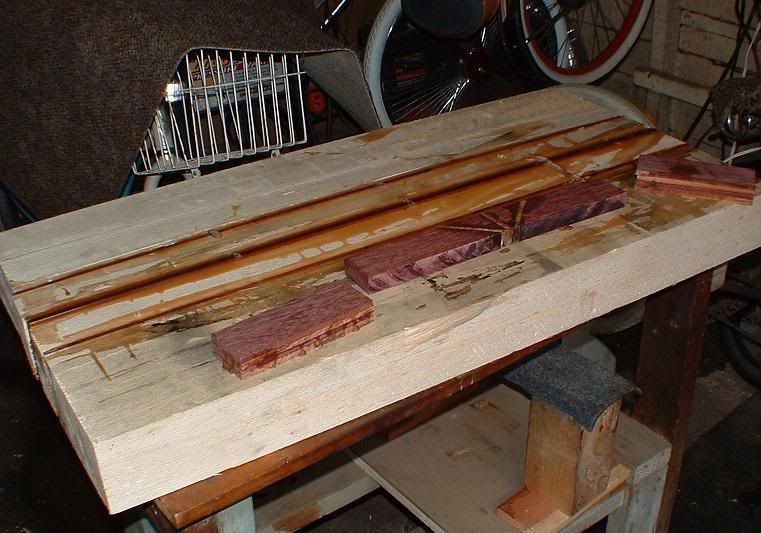
make some nice fins(optional)

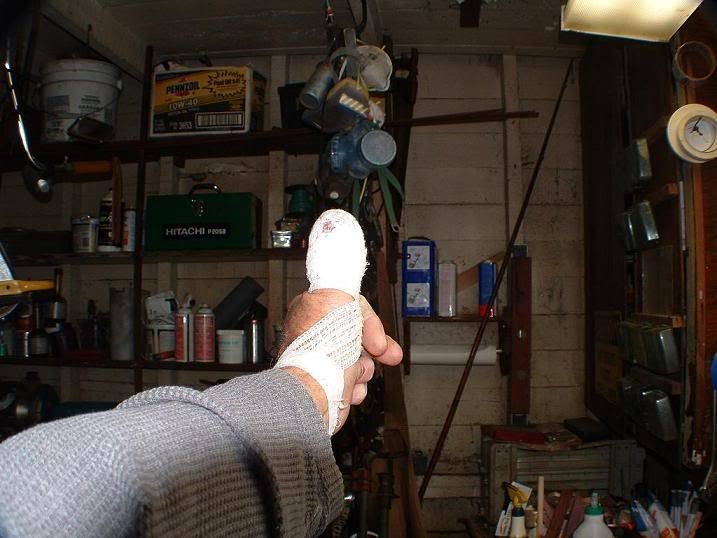
most importance don't cut yourself!!!!!!
planer the wood block flat
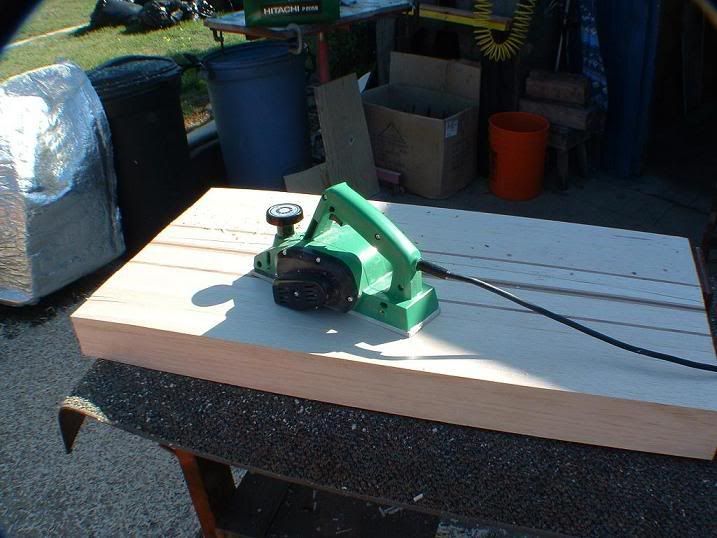
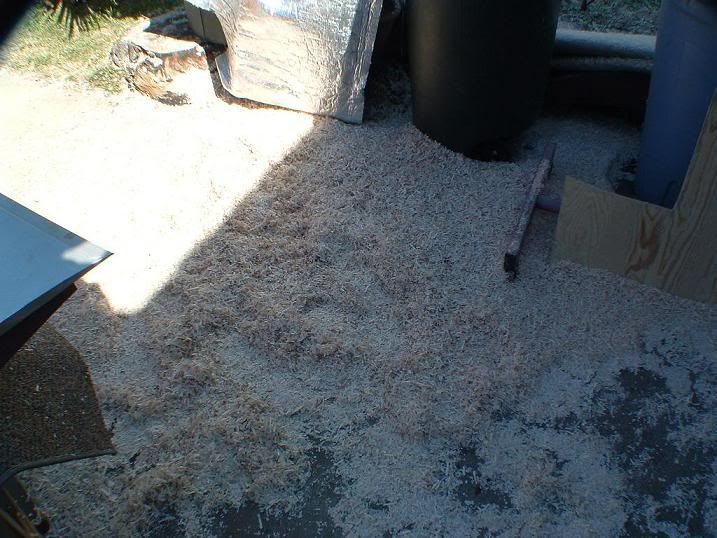
save the chips and dust good for your plants
cut a nice shape
sand and shape the board(this is the fun part)
glass & epoxi it or oil it(oiling is easer)
put the fins on if you did step two
gloss it up wax it then take it out to your fav brake and the most importance part is have fun!
ALSO DON'T CUT YOURSELF
THAT IT MRMIKE
_________________
PAIPO ON
blog http://mrmikespaipos.blogspot.com |
|
| Back to top |
|
|
bgreen
Joined: 20 Feb 2004
Posts:
Location: Qld. Oz
|
| Posted: Sat Sep 20, 2008 9:30 pm Post subject: |
|
|
Mike,
Many thanks. When you take the thickness out, is this primarily off the bottom or the top? Did this board have the angled join that you were referring to?
regards
Bob |
|
| Back to top |
|
|
mrmike
Joined: 06 Sep 2007
Posts:
Location: coronado, ca
|
| Posted: Sat Sep 20, 2008 10:14 pm Post subject: |
|
|
no angle on bottom it was flat except the nose. most of the wood came off the bottom MRMIKE
_________________
PAIPO ON
blog http://mrmikespaipos.blogspot.com |
|
| Back to top |
|
|
HIpaipo

Joined: 19 Jul 2008
Posts:
Location: Oahu,Ewa Beach
|
| Posted: Sat Sep 20, 2008 10:26 pm Post subject: |
|
|
OUCH!!!!
_________________
" NO SCARED UM, GO GET UM! " |
|
| Back to top |
|
|
bgreen
Joined: 20 Feb 2004
Posts:
Location: Qld. Oz
|
| Posted: Sat Sep 20, 2008 10:31 pm Post subject: |
|
|
Mike,
Thanks again. I am looking into buying some paulownia & importantly some tools. This is a longer term project and I want to learn a bit more yet, so your assistance is much appreciated.
Tips from others are also welcomed.
Bob |
|
| Back to top |
|
|
|
